
Rocamadour
Follow a painting through from inception to completion.
It’s often difficult finding a suitable topic to paint and I spend many hours trawling photographs, especially on the Internet, for ideas. To this end I find Pinterest a goldmine, and will pin many photos for inspiration. It is not my intention to copy these images; they are there purely to fire the imagination of the creative soul and provide a reference library with regard to light effects, colours and content. However, it was quite by chance that a friend posted some photographs of Rocamadour, a town in France built into the rockface of a deep river valley. One photo in particular caught my attention; it looked a good image to attempt to paint, so I first sought her permission to use the photograph.

ROCAMADOUR: Photo courtesy of author Jo Lambert
The first task was deciding which size canvas to use and eventually chose a 15″x 15″ stretched canvas. Next, using my PhotoPlus imaging program, I cropped the picture a little before running it through a grid program to help with the initial drawing. I normally don’t sketch out my pictures, preferring to paint direct, but this particular landscape includes many buildings and I wanted to ensure these were correct in terms of size and perspective.

Image with grid overlaid
From the gridded image on the computer screen I drew the grid onto the canvas and sketched out the picture. Only a rough outline was needed, to show the location of the buildings on the cliff and to obtain the correct proportions; more a guide to painting as opposed to a detailed drawing.

Roughly sketched out image
Once satisfied with the composition, I was ready to begin painting. The original photograph showed a pale, practically white, sky but I wanted more colour in my version because the building on the skyline is a pale cream colour (as are the rest of the buildings), and would not have stood out well against a pale background. Using a mixture of cobalt blue and titanium white, I worked in the sky with a wide, flat brush, painting the top and side edges of the canvas too to form part of the image. This allows the painting to be hung without a frame if required.

Using a thin mix of cobalt blue, lemon yellow and white, I painted in the background hill. When this was dry, I proceeded to fill in the wooded hillside on the left of the painting, some of the trees around the buildings on the cliff-face and at the bottom. This was done using a natural sponge and dabbing on at random black, midnight blue, red and yellow (again remembering to paint the side and bottom edges of the canvas). Over this background I will later add further tree detail.
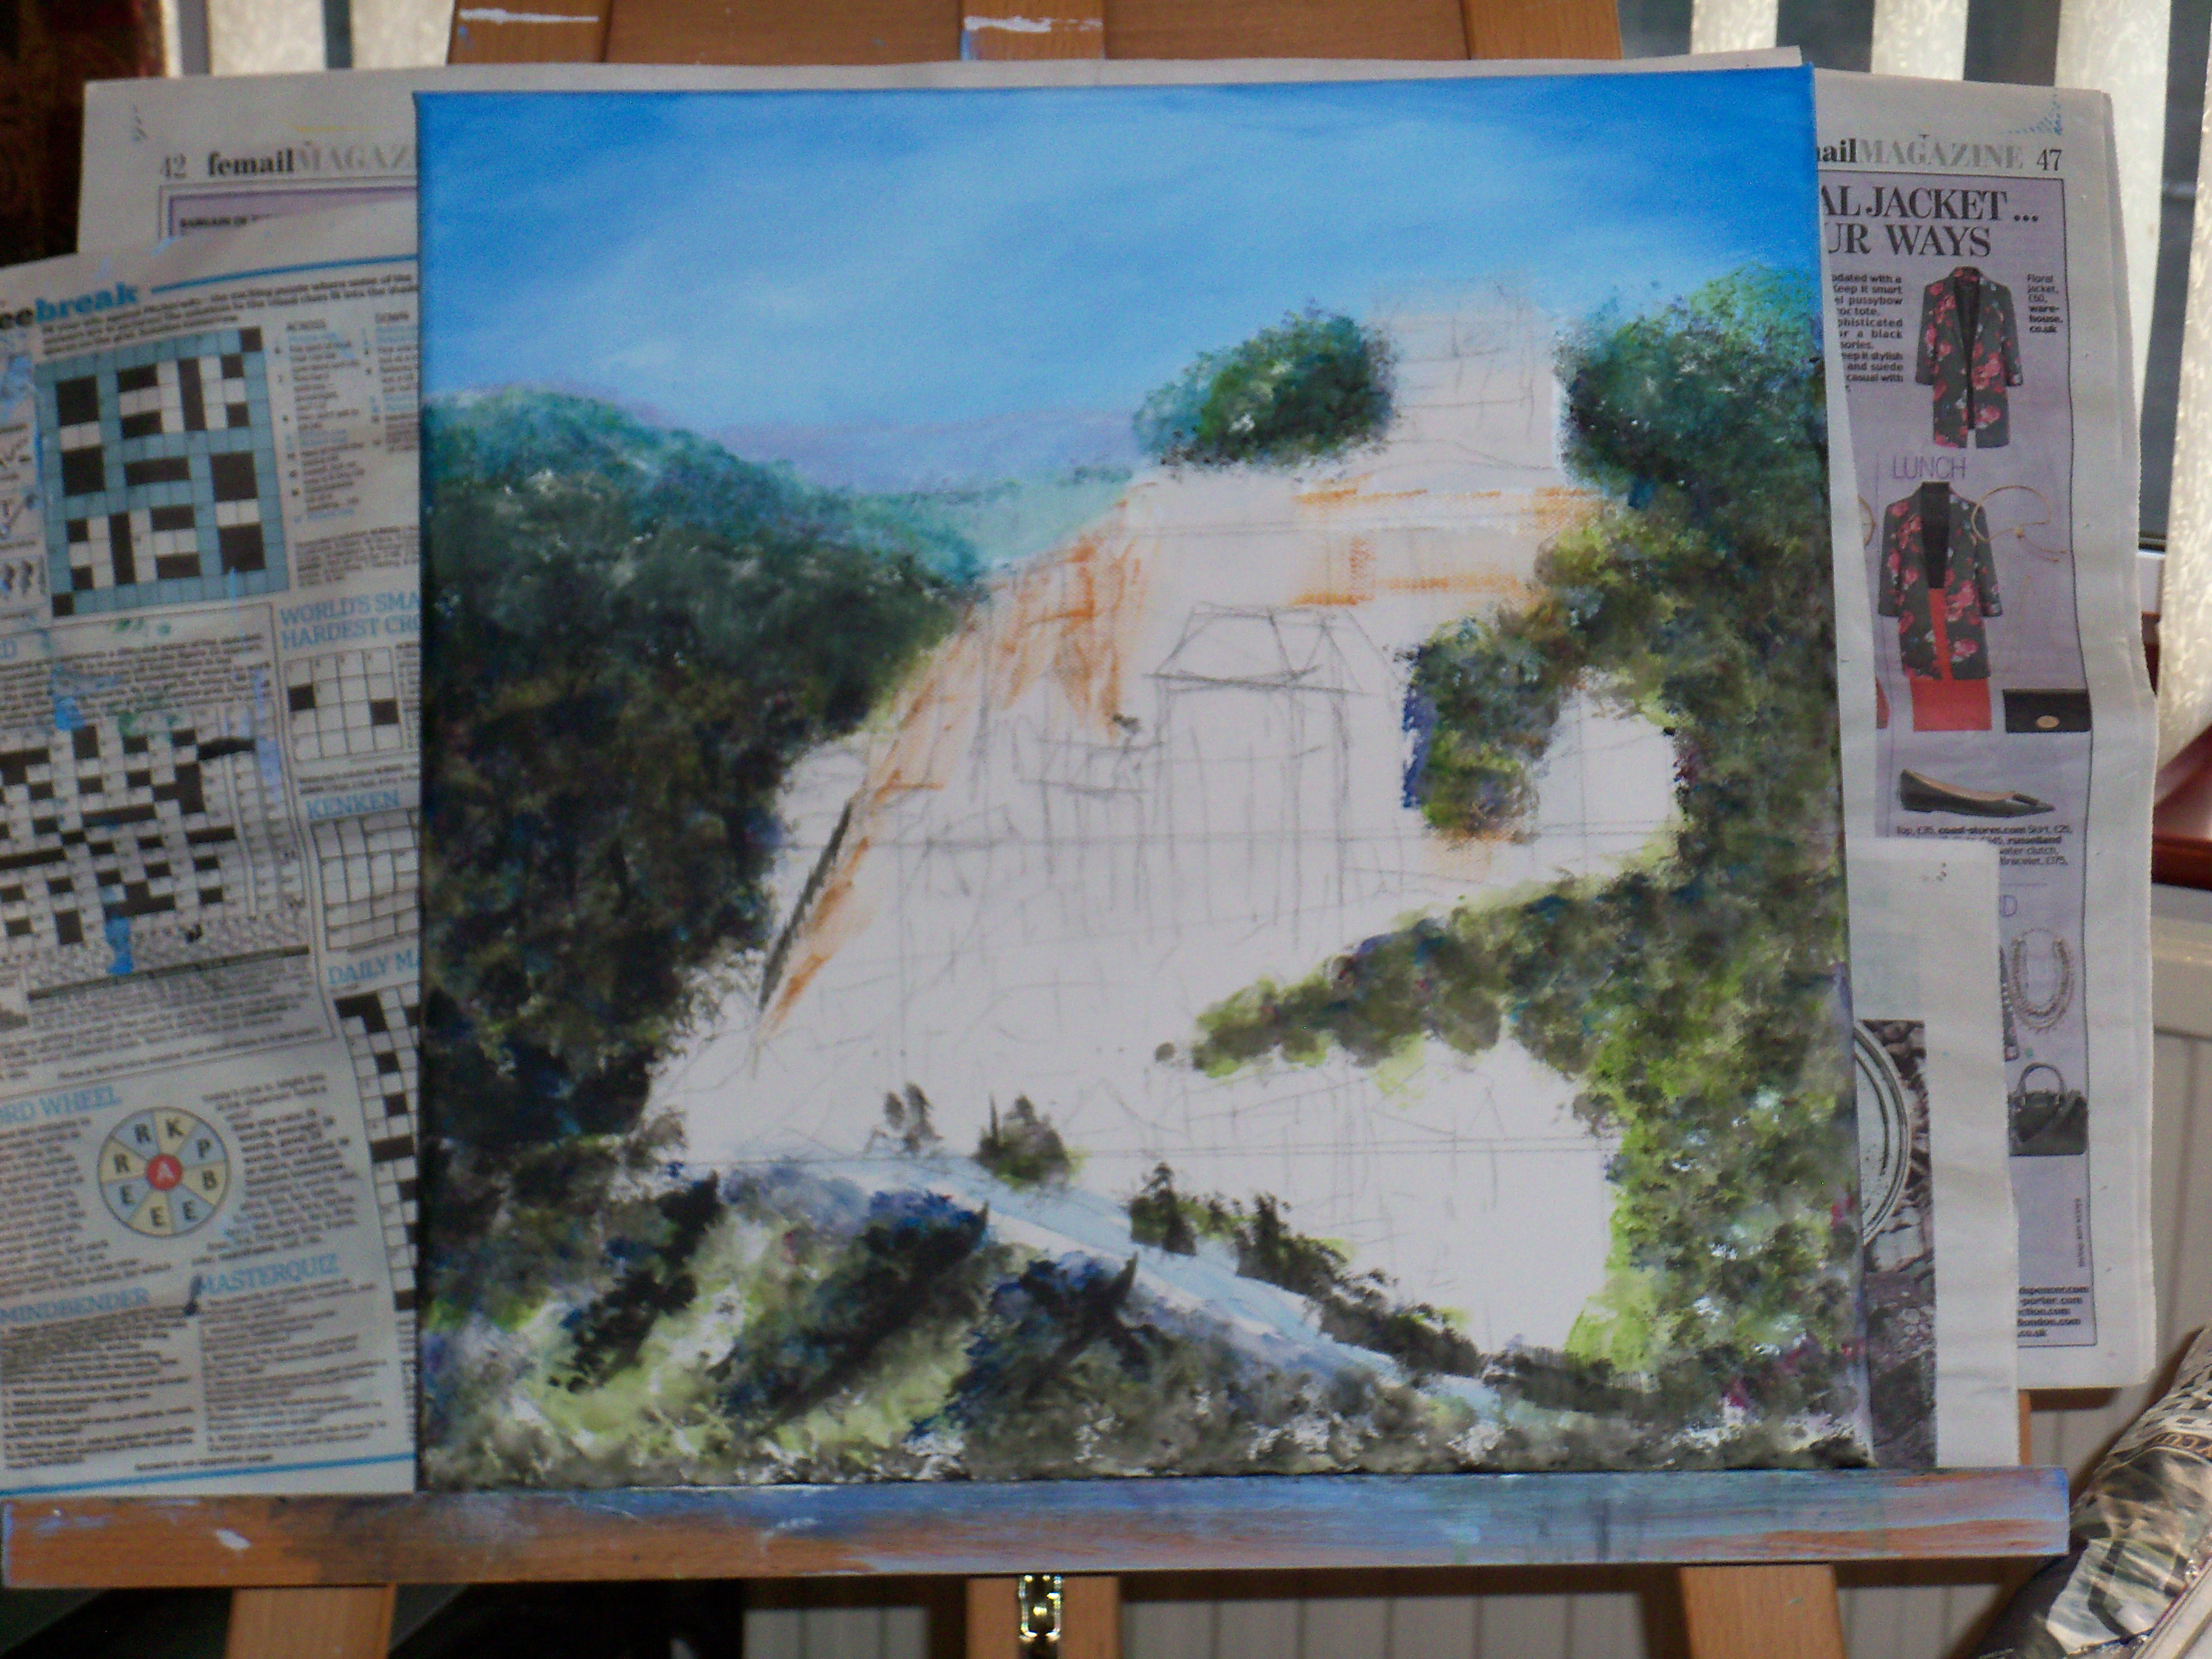
More definition to the background trees on the left have now been painted with a filbert brush using various shades and tints of midnight blue, lemon yellow and sap green to define the trees and layers. The buildings were blocked in with a flat brush using titanium white and a hint of raw sienna. Highlights will be added later to define the light source entering the picture from the left.

I have now blocked in the rock face. This proved to be more complicated than anticipated. In the photograph, the rock and the buildings are of a similar colour, some buildings difficult to make out against the rock, so I have used some artistic license in painting in the cliff darker than the image, although I still need to add highlights. There is a lot of detail in the photograph of the actual rock structure. Rather than try to interpret every crevice and crack and layer I’ve “hinted” at what is there, likewise with the shape. Nor do I intend to paint in every house. Using a mixture of paynes grey, white and bismuth yellow, I first blocked in the rock then, using a liner brush, painted in layer lines in black. Whilst the paint was still damp, I scraped in vertical lines using a painters knife, to allude to the vertical striations, scraped over the black lines so some show through. The two tunnel entrances were added.
I have now begun to paint the outline of the houses and castle in more detail. This, I am finding a challenge, for I am not a confident artist when it comes to buildings, and find it difficult to achieve straight lines, so patience is a must here, and after a few hours work I have to walk away from it for a while. This is also important to allow the paints to dry thoroughly as, like oil paints, they meld together.

Whilst producing a painting I find it essential to stand back often from the work and observe it, and during the times I am not actually painting, to keep coming back and taking another look, seeing what is missing, what doesn’t sit right and what needs further attention or should be left alone. Already I can see the roofs need toning down, although so far I am pleased with how the castle on the top looks. Despite the challenge of this piece, I am totally enjoying the experience.
I have toned down the roofs and carried out further work on the buildings. I’m in two minds now as to which way to go with this; whether to “bathe” the buildings in sunlight, or create a more mellow, “evening” light. The jury’s out at the moment.

The next step is a very slow process: adding in the detail to the buildings including the windows. I shall not be painting in every one, just giving a taste of what is there; the reason being it’s when I come to paint in windows, I usually make a mess of things as my hand shakes a lot when creating straight lines. A shaky hand is perfect when drawing trees and branches but not much help on buildings. I was given a very good tip to help: hold the brush much lower done, nearer the bristles, and to use the little finger as a guide and help keep the fingers steady. It certainly works. The trouble is, it’s easy to get carried away and become over confident, so I’ve put in a few on the castle then stopped. I shall add more in the next session. I have painted in the castellations using a liner brush, pushing it upward rather than downward, to create each one. I’ve also blocked out the cliffs to the lower right of the picture; realising they are not cliffs, but further buildings, so I have outlined a few a little further up, almost parallel with the main central building. I think it’s all finally coming together.

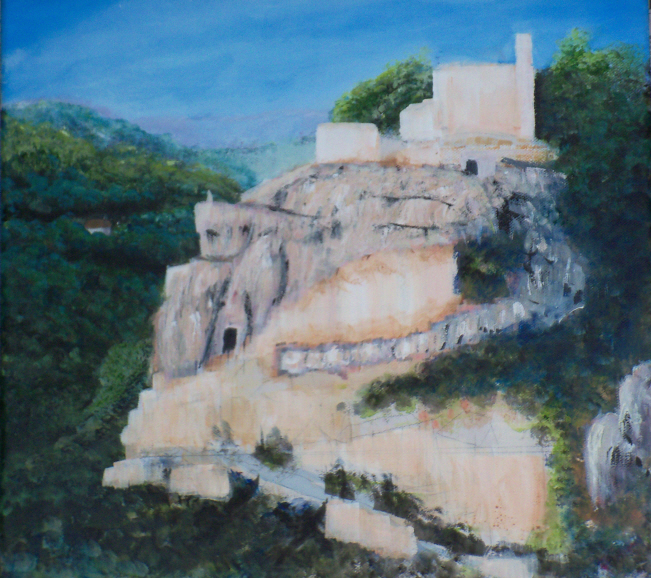
The next session involved the adding windows and other features to the buildings. This is been a long, slow process that at times made me want to scream with frustration as I couldn’t get it right. I think this was because I was trying to be too precise and accurate. The large central building is a complicated structure with several buttresses. It took a while to fathom out the best way to include these and several attempts, but that is the joy of acrylic paints: it is easy to paint over and correct. I also used another tip I’d seen the artist Terry Harrison use when painting straight lines, that is to use a piece of card to help protect areas. By painting along the edge of the card, with the brush more on the card than the canvas, fine lines could be achieved. This method helped immensely and one I shall be using again. That just leaves the arched windows to add to this building.

In this session, I’ve now included the windows to the central building, and added further shadows and details to others. At long last, Rocamadour is coming alive. All that remains now is to paint in the foreground trees in more detail, and add various highlights. At the moment, the buildings to me look too clean and fresh, as if nearly built, so I may need to add some distressing to them. This will be done with great care as it is all too easy to overwork a piece by tweaking and fiddling at the risk of spoiling the whole thing. I shall leave the piece now for several days propped on its easel where I can see it from across the studio before I continue doing any further work to it. By observing and looking objectively at it, it will become clear what needs to be addressed or, indeed, left alone.

In the final session, the foreground trees have been added, along with a few more highlights and shadows. In the reference photograph there are branches and leaves at the top and top left framing the view, but I decided to omit them as I did not think they were necessary. This was never intended to be an exact replica of the photo but a representation; a painting can be made or ruined by fiddling too much to try to make it such, although it is often difficult to reach the point when you can safely say “Finished”. Thus, before spoiling what has been done, I have signed the painting and am calling it done.

This work has been exceedingly challenging for me, as I’ve explained, because I am not comfortable drawing buildings and especially straight lines but during this exercise I have learned various techniques and tips which will carry forward into other works. I’ve also learned a lot about the town of Rocamadour and its history. Painting this scene has given me the confidence to attempt painting something I’ve always wanted to do, and that is a view of a typical Spanish town, for example Mijas, somewhere I have visited on many occasion. More importantly, it has given me impetus to include more buildings in my landscapes and to accept a possible commission piece I am currently discussing with a client.
I hope you have enjoyed following Rocamadour, and your comments have been appreciated and valued.
Thank you.
Note: click on any image to enlarge.

15 Responses to “Rocamadour”
This is fantastic Kit! It’s really interesting to learn how this painting is gradually coming to life. I look forward to more as the journey progresses
Thank you, Jo. I only hope I can do your photo justice. 🙂
Thank you Kit for sharing this with us – it’s coming together great and will look fantastic. Can’t wait for the next instalment.
Love Janet
Thank you, Janet. Proving to be quite an challenge. Pleased you like so far. x 🙂
Amazing, Kit! I had no idea how a painting was ‘built up’ from the bare canvass. Hours and hours of work – but truly stunning!
Many thanks, Linn. It takes time and patience and most times very relaxing – except when something doesn’t come as planned. A bit like writing a novel! Hope the end product will be worth the effort. x
You are so very talented. Beautiful x
Thank you, Pauline. I can feel another blush coming on. Hope the final outcome will be worthy of all the praise. Am in grave danger of starting to fiddle too much. x
Watching the painting come together is awesome. I envy you, your talent.
Thanks, Lavada. Certainly a first for me, tackling so many buildings but has been a great learning curve. 🙂
It’s really beginning to come alive now, Kit! Such a mammoth project because it’s about perspective, as well as such a lot of detail. Can’t wait to see the finished version.
Now it’s finished it is simply amazing! Will you be selling or keeping it for yourself?
Thanks, Jo. It is for sale if anyone is interested.
The difference in that final push has really brought the paining to life, Kit! It’s as if suddenly the sun is shining down on it and you have to be so thrilled with the result – truly, truly amazing! Well done, clever lady!
Thanks, Linn. Been an enjoyable excursion. And thank you for following me on this trip. xx